The Products Area
Introduction
Promaster uses products as placeholders to store data. All products are visible to the left in the application. It is possible to have parent-child relations of products by dragging a product and dropping it on another product in the list - this creates a product tree.
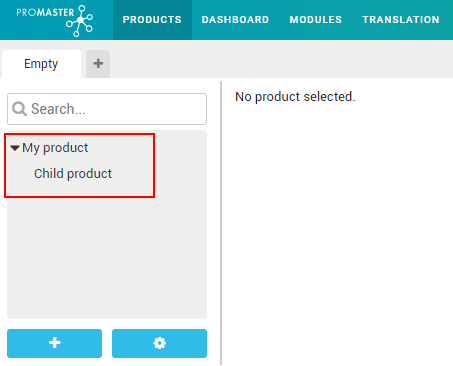
Product tree
Product trees are a good way to organise your products. The top product can act as a placeholder for the sub products but it can also contain information such as common descriptions for the products in the tree. This can be useful if the information about the products is published on a web site and you want ta have overall descriptions, images and documents that are valid for all the sub products.
Create a product tree by drag a product and drop it on another product. To get a product out of a tree drag and drop it in between two products in the level above.
Sorting
The products in the tree can be sorted by dragging a product and dropping it in between the products where you want it. If it is dropped on another product it will be placed under that product, see product tree above.
Multiple tree views
It is possible to organise the products in different tree views. You can for example have an organised tree view as described above and complement it with a flat list with all products in alphabetical order. To create new or edit current tree views click on the gear at the bottom of the tree view.
Add product
Add a product by clicking on the + button at the bottom of the tree view. It is also possible to add a product directly below a product in the tree by clicking on the three dots visible when hoovering over a product and select "Add product".
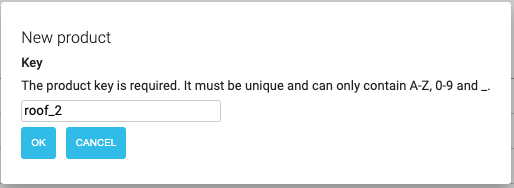
Enter a product key which must contain of only letters, numbers and _. Blank spaces are not allowed. Click OK.
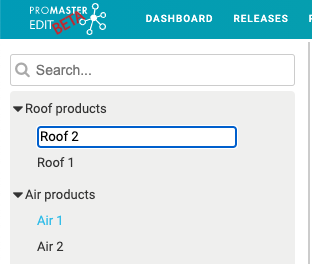
Enter a name for the product and hit "Enter". The name can contain any characters including blank spaces.
Product menu
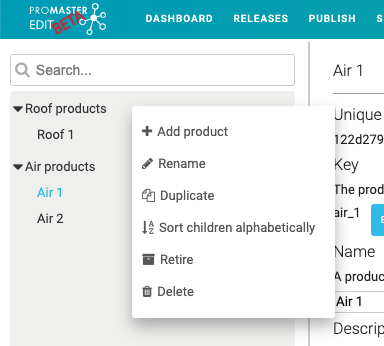
When hoovering over a product name in the tree view three dots appears. Click the dots to open the product menu and select desired function from the menu.
Product Module Setup
Selecting a product in the tree opens the modules view to the right. Different modules are used to edit different kinds of data for the product. In the image below the setup module is selected. It allows the user to configure settings for the selected product.
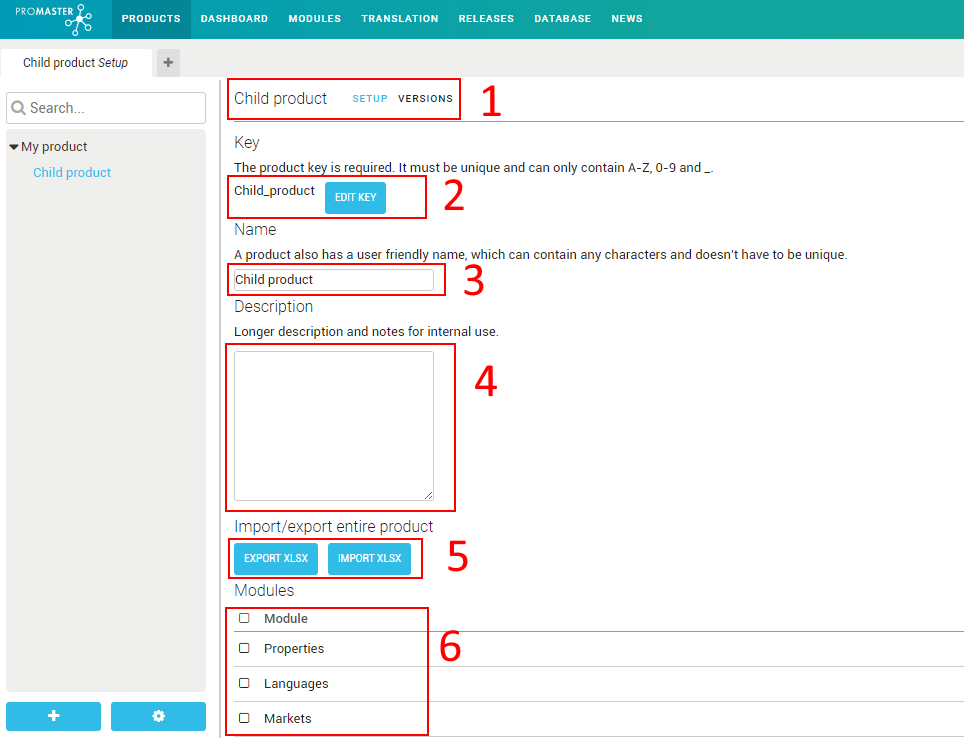
- A menu with all the available modules for the product. Clicking on an item opens the module.
- Every product must have a unique key. The key should be fixed throughout the products lifetime, it can however be changed by clicking the edit key button.
- A user friendly name for the product that can be changed at will.
- A textbox where you can enter a description for the product.
- Functions to import/export the entire product with its data to Excel. The same excel can be edited and then imported using the import button.
- Allows the user to set what modules should be available for the product. Checking an item here displays the module in the module menu 1.